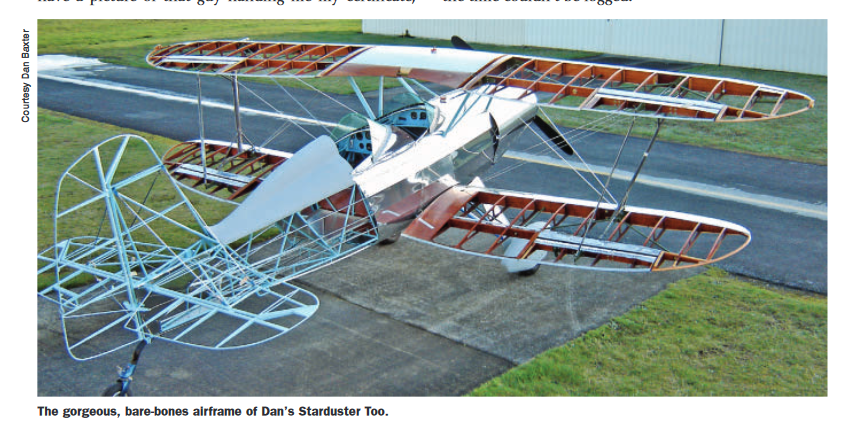
I’ve started looking at the plans that came from Bruce, and I’ve got all of the photos from the amazing trip that James did.
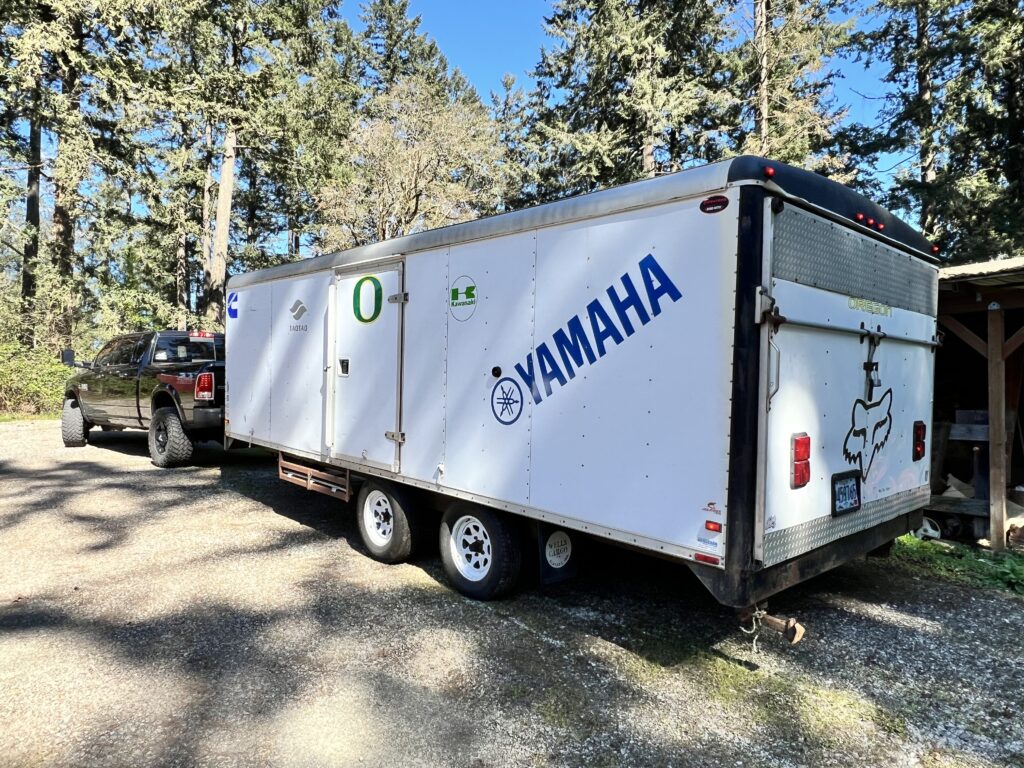
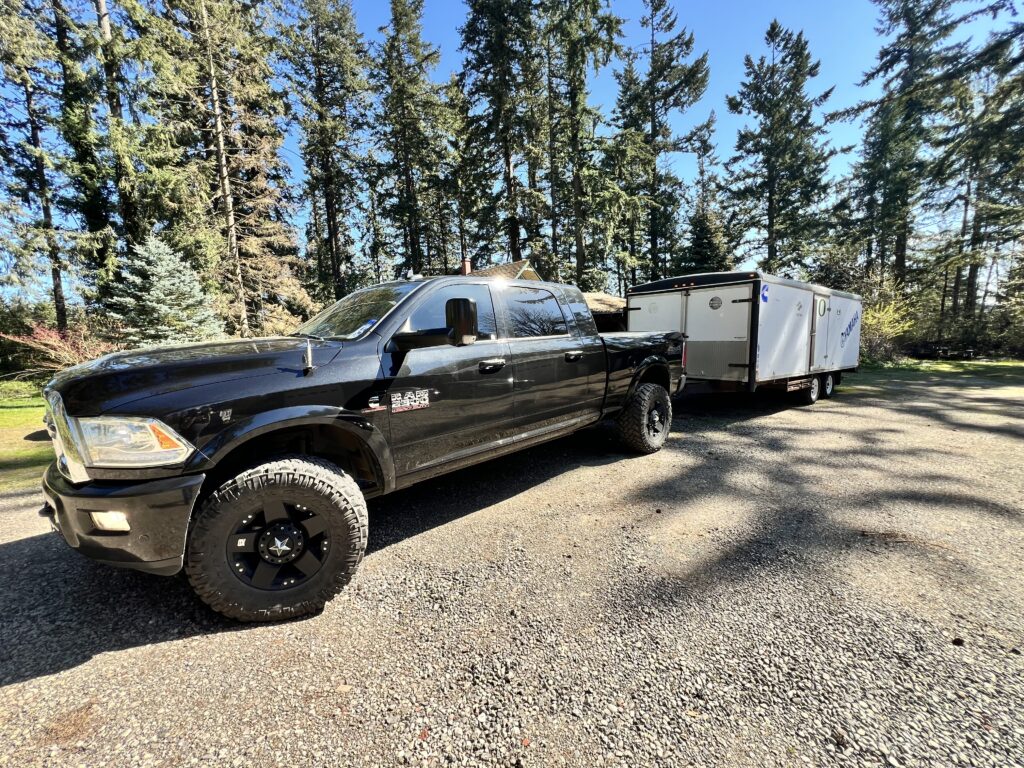
I’ve also started getting all of the books and EAA documentation together. My goal is to do something every day, and blog about it so I have a log. So far we are on day 1. I’m going to be backdating the trip, and Friday’s unloading.
So I’m finally getting back to updating and using the GRBL wire bender, so I have to actually use it for something. I had built it to be able to bend various springs, when I can’t get ahold of exactly the right spring, so let’s go though a basic spring design. The other use is for bending copper wire into antenna shapes, but that’s further down the spiral…
Types of springs
Each type works a little differently in the code so let’s start with some definitions:
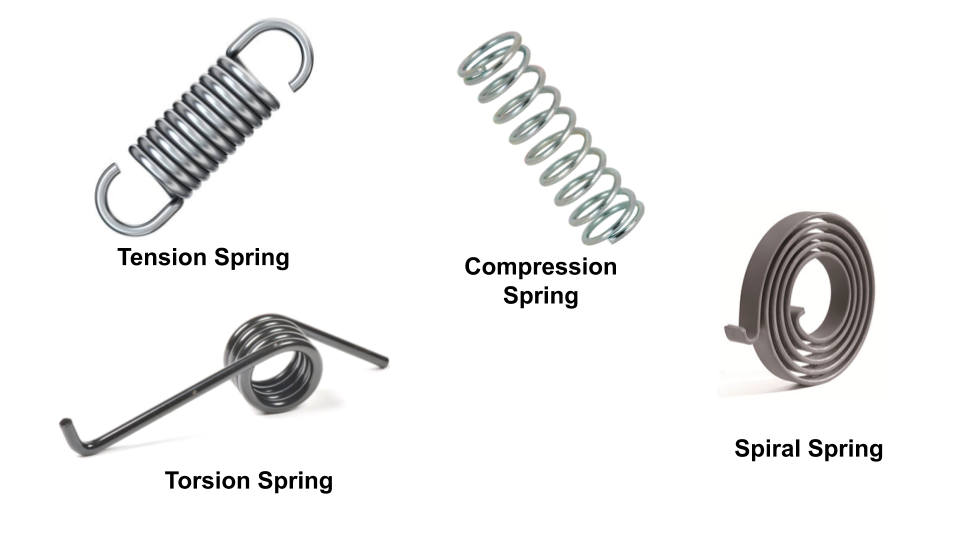
Types of springs for the machine
The bender really only can do springs made of wire, so disc / Belleville springs, and leaf springs don’t even enter into this conversation, so the types I’m targeting is:
Tension Springs
Compression Springs
Conical Springs
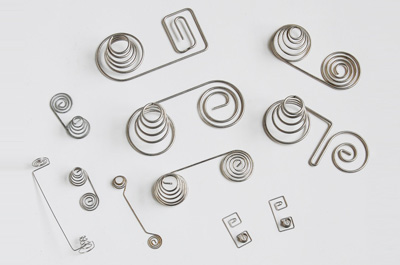
Spiral Springs
Torsional Springs
Compound variations of above
Spring construction
The spring body
All of these types start with a coil of some sort, as the base and then some sort of legs, The coil could be flat, as such as a spiral spring, close together like a tension spring, spread apart like a compression spring, or a lofted spiral like a conical spring. The wire diameter, the number of coils and the spacing between the coils changes how the spring responds
The legs
The leg styles are basically three different styles, there is a straight wire, a straight wire with a hook, a loop, or a bunch of coils together. For example a tension spring typically has a loop or a hook, whereas a compression spring typically has coils together as the end, and a torsion spring, or a spiral has two straight wires.
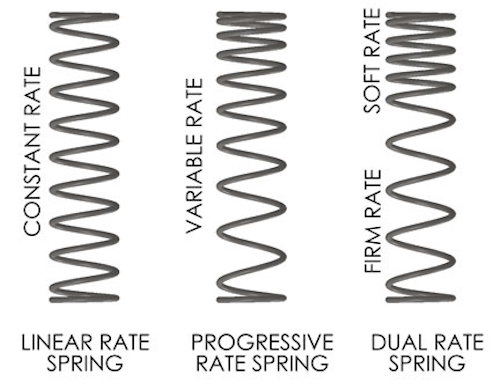
Spring rates
The spring body basically is a spiral, where the spring rate is controlled by the spacing of the coils. Given that we can control the machine, we can change the spacing on the fly resulting in being able to create differing spring rates using the same wire, in the same spring. If the spring spacing is consistent, the spring will have a constant rate of compression, if we slowly change the spring spacing we can generate a spring that changes spring rate when it compresses, and if we put two springs together we can have a dual rate.
Cool springs are coming!
Now let’s make some cool springs. The next one will breakdown the Gcode for making a fairly standard coil spring.
So StarLink has a 12month waiting period, and they just had a bunch of satellites burn up in the atmosphere, so I don’t expect my StarLink to ship anytime soon.
The LTE device has come back out of the camper, and runs my laptop, while the rest of the house is running off DSL.
Meanwhile at work, I’m getting a new fiber installed into the premises, How come you can’t come here? I’d even take the evil comcast.
One of the issues with living in the middle of nowhere.
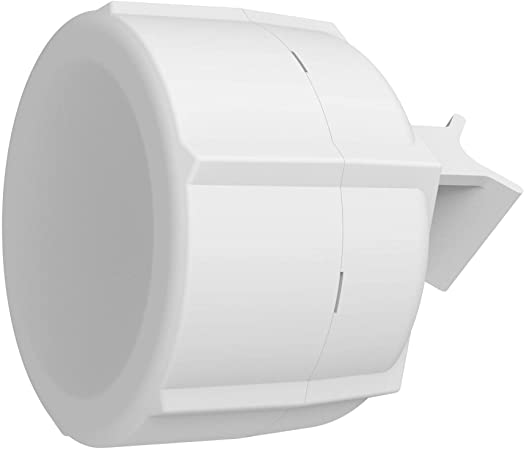
The MikroTik I bought seems to work well, but I’m still seeing 20ms delay rate. It’s about $30/month, but that delay makes it difficult to use Teams in video.
I’ve preordered a Starlink dish, and hopefully that’s better.
In the mean time I’ve move the MikroTik to our camper, where it works very, very well while we are on the road. I just need to add a rotator and a knock down mast somehow that works while we are driving.
So I live out in the middle of no where USA, and we have crappy internet service… like DSL is still a viable option here. Fiber, Cable and all of that are passing most of us who live here by, due to stupid regulations, and monopolies providing for the people, but looking for profit.
The part that is really frustrating is they just installed new fiber at the end of my road, and will not bring it down the road for us to use. Here’s looking at you CenturyLink!
I hopes of getting better service for less than the $80/month for 3mbs that CenturyLink is charging me, I’ve purchased an LTE modem made by MikroTik.
It took me 22 days to get it configured, which as an IT “Professional” is total BS.
So in hopes of others having more success than I did, Here’s the keys to getting my device up and running on T-Mobile for about $30/month.
1) Don’t get a contract, get a prepaid hotspot card. In order to do this you will have to drive to a T Mobile store run by T-Mobile, specifically ask for it, and then wait two hours for them to activate a card and hand it to you. You will need to bring your device, in order for them to look at it and say it’s not compatible. You cannot open an account with them, or add onto an existing account.
If you want to save the $10 that they charge you for the card, call the phone number, ask them to activate a line, and mail you a card. Take this card into the store, and say “can you please activate this card.” They will promptly though your card into the trash and issue you a new card, but will not charge you for it.
2) in your MikroTik, login with all of the defaults, and setup your password, and associated LAN settings.
3) reboot your MikroTik.
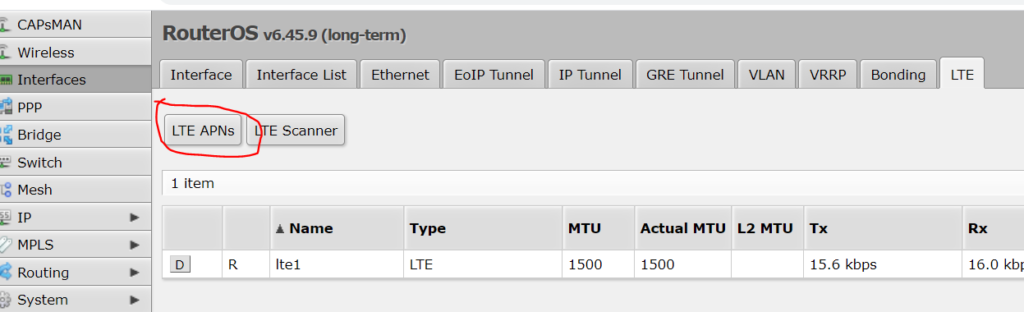
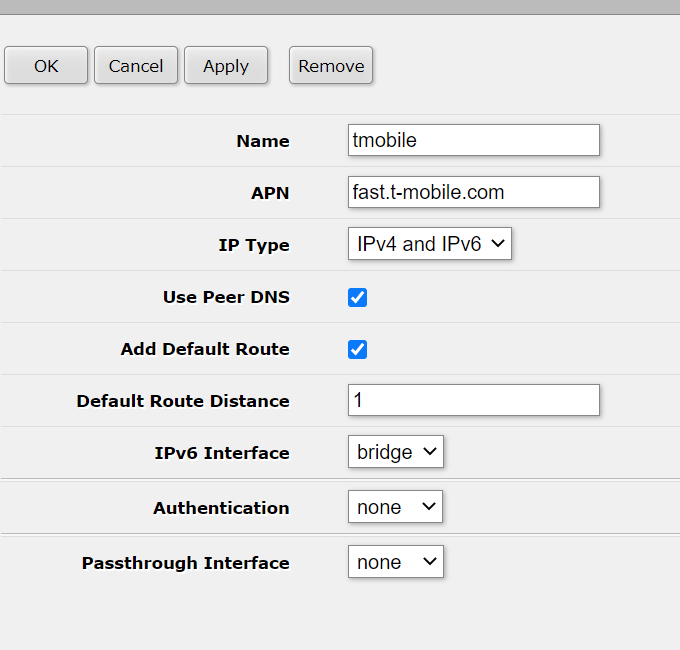
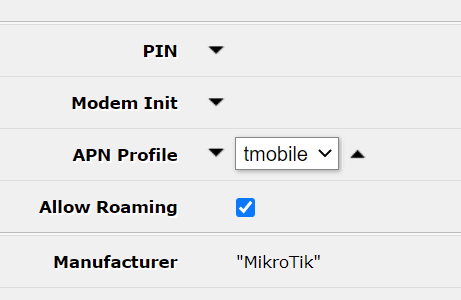
4) go into Interfaces -> LTE and click on the LTE APN’s button.
7) under Interfaces -> lte1, assign the APN to your interface
8) Wait like 10 minutes for T-Mobile to stop being stupid, go have a cup of coffee or something.
9) Rejoice at your less crappy internet connection.
I’m now seeing 3mbs download as well as 3mpbs upload, Quite an improvement over my 0.8mbs upload speed that CenturyLink thinks is acceptable. You may also need the DNS information for T-Mobile, which is located here: https://www.sprint.net/faq/dns
Now I just have to get it up on the pole, but that’s for another day.
So I wanted a cool LED controllable light up thingy… Because
It lights up.
I needed a status for my camera for the Teams stuff when I’m at home, so my Wife does not accidentally walk though the camera
It’s a big bright light.
So I first looked at the unicorn hat, but this is discontinued, so then I went to my favorite electronics store, Adafruit.com, and they did not have what I wanted in stock, so I found a cheap knockoff on amazon (azin #B081BCBQ6B if you are interested) and wired it up.
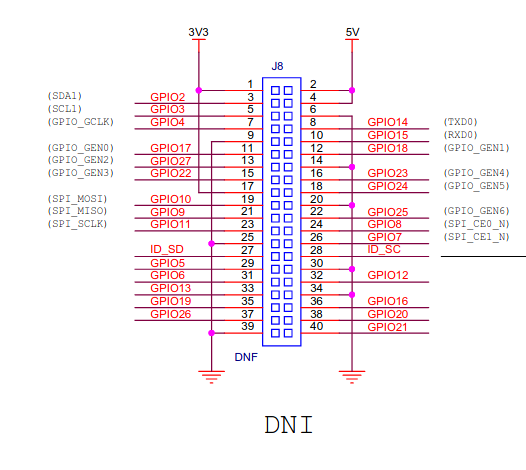
I’m working off of port 18, and pulling power from the usb port for the PI, and it seems to work well, and it’s a simple 3 wire hookup, +5v, Gnd, and Data (GPIO18).
Now we need a tester, so let’s also use Adafruit’s tester as well. I’ve modified it for 64 pixels, but nothing else yet. The code is mirrored here if you want to try it.
# Simple test for NeoPixels on Raspberry Pi
import time
import board
import neopixel


# Choose an open pin connected to the Data In of the NeoPixel strip, i.e. board.D18
# NeoPixels must be connected to D10, D12, D18 or D21 to work.
pixel_pin = board.D18

# The number of NeoPixels
num_pixels = 64

# The order of the pixel colors - RGB or GRB. Some NeoPixels have red and green reversed!
# For RGBW NeoPixels, simply change the ORDER to RGBW or GRBW.
ORDER = neopixel.GRB

pixels = neopixel.NeoPixel(
    pixel_pin, num_pixels, brightness=0.2, auto_write=False, pixel_order=ORDER
)


def wheel(pos):
    # Input a value 0 to 255 to get a color value.
    # The colours are a transition r - g - b - back to r.
    if pos < 0 or pos > 255:
        r = g = b = 0
    elif pos < 85:
        r = int(pos * 3)
        g = int(255 - pos * 3)
        b = 0
    elif pos < 170:
        pos -= 85
        r = int(255 - pos * 3)
        g = 0
        b = int(pos * 3)
    else:
        pos -= 170
        r = 0
        g = int(pos * 3)
        b = int(255 - pos * 3)
    return (r, g, b) if ORDER in (neopixel.RGB, neopixel.GRB) else (r, g, b, 0)


def rainbow_cycle(wait):
    for j in range(255):
        for i in range(num_pixels):
            pixel_index = (i * 256 // num_pixels) + j
            pixels[i] = wheel(pixel_index & 255)
        pixels.show()
        time.sleep(wait)


while True:
    # Comment this line out if you have RGBW/GRBW NeoPixels
    pixels.fill((255, 0, 0))
    # Uncomment this line if you have RGBW/GRBW NeoPixels
    # pixels.fill((255, 0, 0, 0))
    pixels.show()
    time.sleep(1)

    # Comment this line out if you have RGBW/GRBW NeoPixels
    pixels.fill((0, 255, 0))
    # Uncomment this line if you have RGBW/GRBW NeoPixels
    # pixels.fill((0, 255, 0, 0))
    pixels.show()
    time.sleep(1)

    # Comment this line out if you have RGBW/GRBW NeoPixels
    pixels.fill((0, 0, 255))
    # Uncomment this line if you have RGBW/GRBW NeoPixels
    # pixels.fill((0, 0, 255, 0))
    pixels.show()
    time.sleep(1)

    rainbow_cycle(0.001)  # rainbow cycle with 1ms delay per step
I often get lazy and don’t want to look up the IP of some PI that I just installed the OS on, nor do I want to go find the monitor.. This is where the USB SSH terminal comes in super handy.
This is a Linux thing, so if you have windows, I’m sorry. Google it more.
So step one is to install the ISO of your choice. I used the Raspberry Pi OS Lite version from the official source at: https://www.raspberrypi.org/software/operating-systems/, even though I don’t like Debian. The configuration files are all in the wrong place… anyways.. it’s stable and runs well.
Install is fairly straight forward. Unzip the download, and run dd. Replace the img with your image, and sdX is your SD card.
This will create two drives on your device, The first being boot, and the 2nd being root. Let’s start in boot. Touch the SSH file, and edit the config.txt to add the dtoverlay line.
Now open cmdline.txt using your favorite text editor, which of course is Vim.
vi /Volumes/boot/cmdline.txt
add
modules-load=dwc2,g_ether
after “rootwait”, and before anything else. make sure there is only one space between all of them otherwise it will get borked. Now I’m going to be lazy and hook up both Wifi and USB Networking, so I’m going to configure the USB on a static IP address
vi /etc/dhcpcd.conf
Skip down to the bottom and add a USB configuration. In this example, I’m not specifiying the DNS entry for the USB, because I want it to pull data though the wifi when possible.
I don’t have a 192.168.7.xxx network anywhere, so I’m using that. Now I just go and configure my USB network on my PC to be a Static of 192.168.7.1, and I’m done. Plug the USB cable into the center USB connection, and wait for the light to turn on. Now I can SSH into the board without issue.
So I’m working on a quick and dirty Raspberry Pi Zero W based status light, and ran into some issues.
First of all, the version that ships with Raspberian OS light is version 2.7 of python.. that’s old, so let’s fix it.
After logging in I do a:
sudo bash
This is because I’m lazy and don’t want to type it all the time. I’ve been using unix for too long to not have a root account.. bad practice, but I’ve been using it that way since SCO unix was cool.
First thing is to run the update by doing the following:
root@raspberrypi:~# apt update
root@raspberrypi:~# apt list --upgradable
root@raspberrypi:~# apt upgrade
Now make sure Python 3 is installed
root@raspberrypi:~# apt install python3
but after the update, let’s check…
root@raspberrypi:~# python --version
 Python 2.7.16
root@raspberrypi:~# ls -l /usr/bin/python
 lrwxrwxrwx 1 root root 7 Mar 4 2019 /usr/bin/python -> python2
Well… that’s dumb… but looking into it more it looks like /usr/bin/python is just a symbolic link.
The actual hardware build consists of several parts
The wire spool holder
The wire straighteners
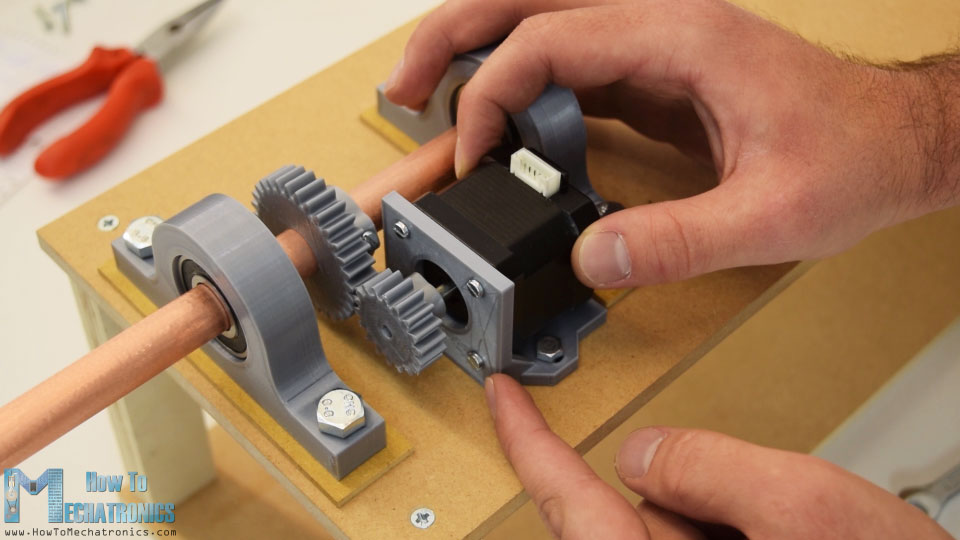
The feeder unit
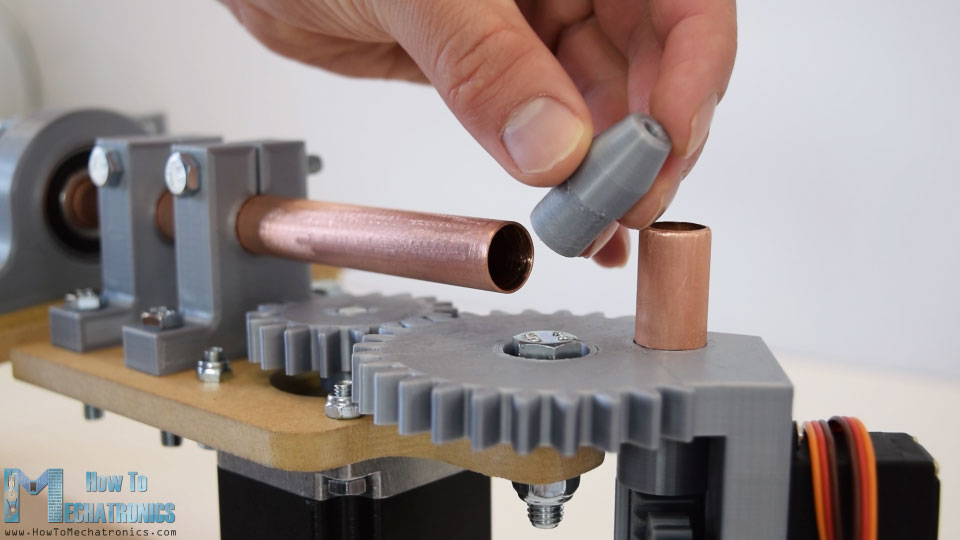
The rotational axis
Our favorite robot: bender
The wire spool holder
The wire spool holder is dependent on what your wire comes in. If your wire is flat piano wire, you can skip the whole feeder mechanism, and straightening parts. Normally though you buy it in a roll. A typical 304 Stainless Steel Wire comes in a 1/4 lb coil and a 1 lb coil. You can also get it on a spool, but don’t expect that.
The way I’ve dealt with this a 4″ long 1/2″ diameter bolt, with a T nut on one side, and locking nut on the other, mounted vertically. The wire simply drops on.
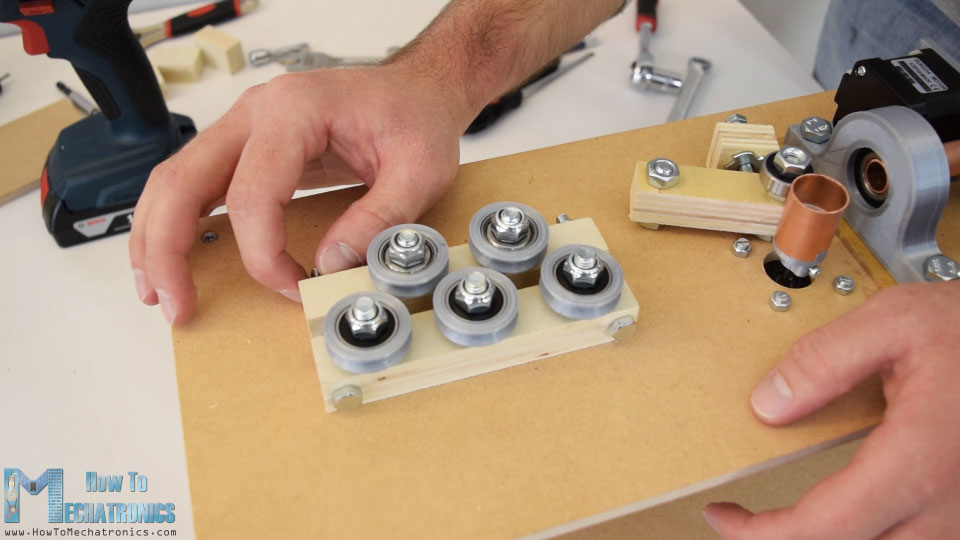
The wire straighteners
In order to get the bend correct, first the wire has to be straight. The straighteners do this by running the wire though a series of rollers. There is two sets, a vertical and a horizontal set, made of a combination of bolts, bearings and 3d printed parts.